Webmeup Tech Support

Clear, simple technical guides for Webmeup clients.

Website Updates

Contact us and we'll sort it.

Mailbox Support

Help with your WebMeUp business email

Google Business Profile

Get found locally on Google Maps and collect 5-star reviews.

View Guide →

iPhone & iPad Email

Set up your WebMeUp business email on your Apple device in minutes.

View Guide →

Domain & DNS Setup

Point any domain registrar (GoDaddy, 123 Reg, Namecheap, etc.) to Webmeup hosting.

View Guide →
Free Local Marketing Guide

How to Set Up Your Free Google Business Profile & Get Local Leads

Get found on Google Maps & Google Search in 5 simple steps!

Why Every UK Tradesperson Needs a Google Business Page

Appear on Google Maps (Local 3-Pack) When homeowners search "electrician near me" or "roofer in Wimbledon", your business pops up on the map at the top of Google.
Direct Phone Calls & Directions Customers can tap a single button on their phone to call your mobile directly or view your Webmeup website.
Build Trust with 5-Star Reviews Collect reviews from happy clients. Tradespeople with 5-star ratings win up to 3x more jobs than competitors.
100% Free Lead Generation Google Business is completely free. No subscription, no pay-per-click charges, and no hidden fees.

Step-by-Step Setup Instructions

1

Go to Google Business Profile & Sign In

Open business.google.com in your web browser. Click "Sign in" or "Manage/Start now" using your standard Google/Gmail account.
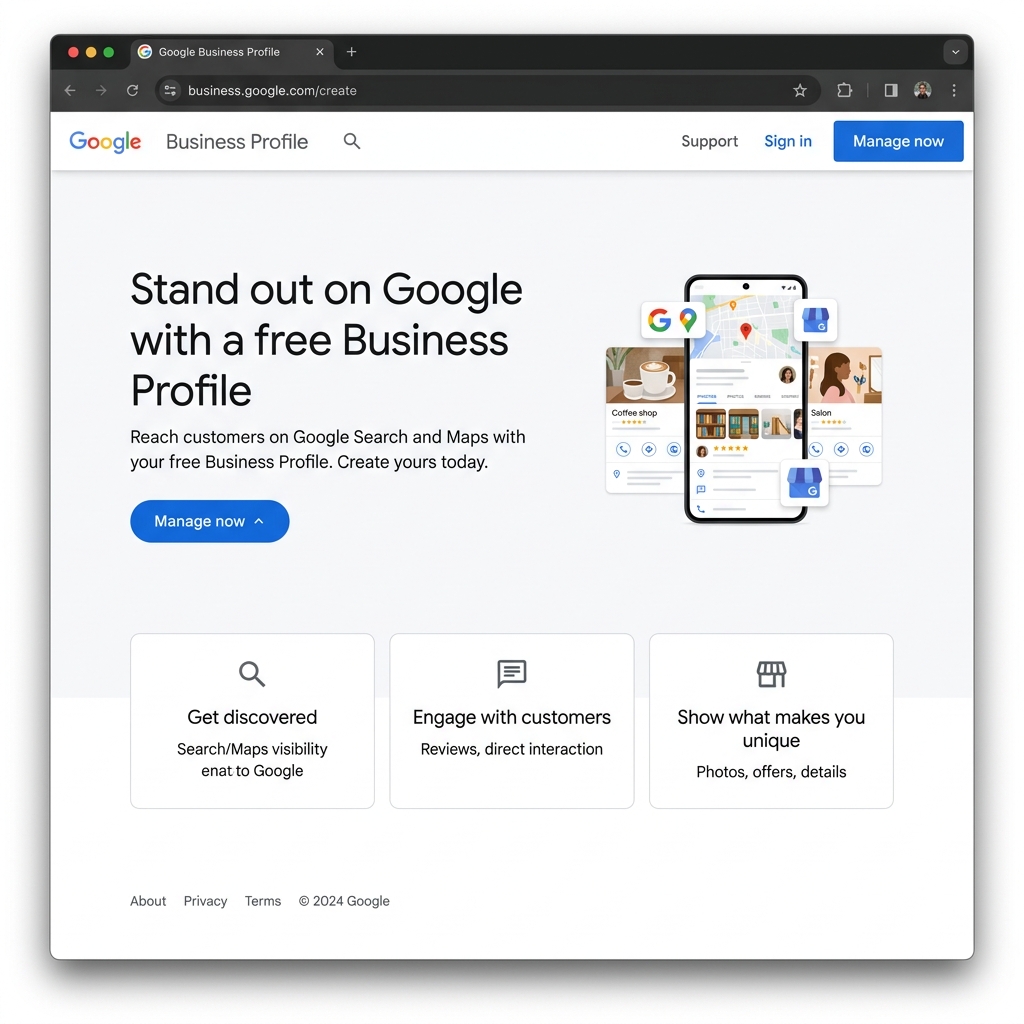
Google Business Profile Sign In Page
2

Enter Your Business Name & Trade Category

  1. Type your exact trading name (e.g. T&D Electrical Services).
  2. Choose your business type as "Service Business".
  3. Choose your business category (e.g. Electrician, Roofer, Glazier, etc).
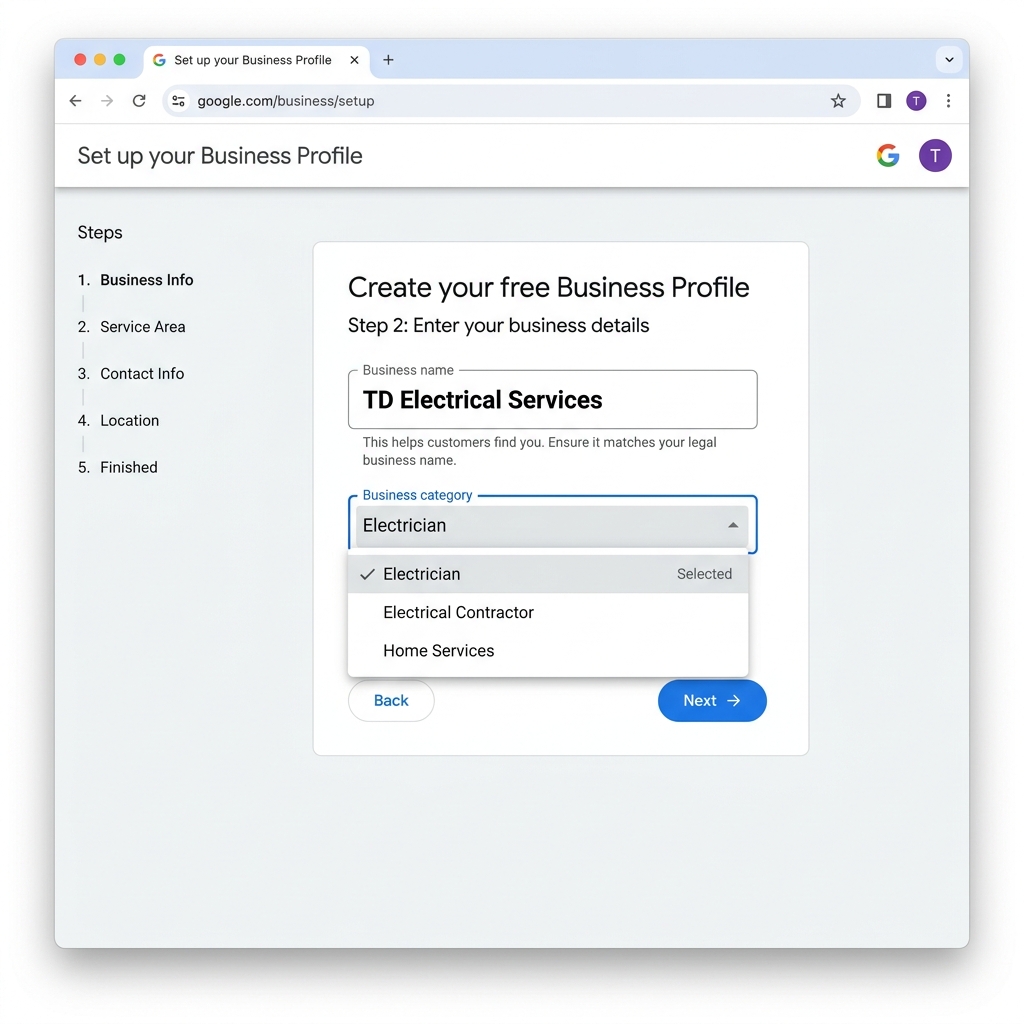
Enter Business Name and Category
3

Set Your Service Areas

As a tradesperson, enter all the local towns or boroughs you cover (e.g. Wimbledon, Merton, Surrey).
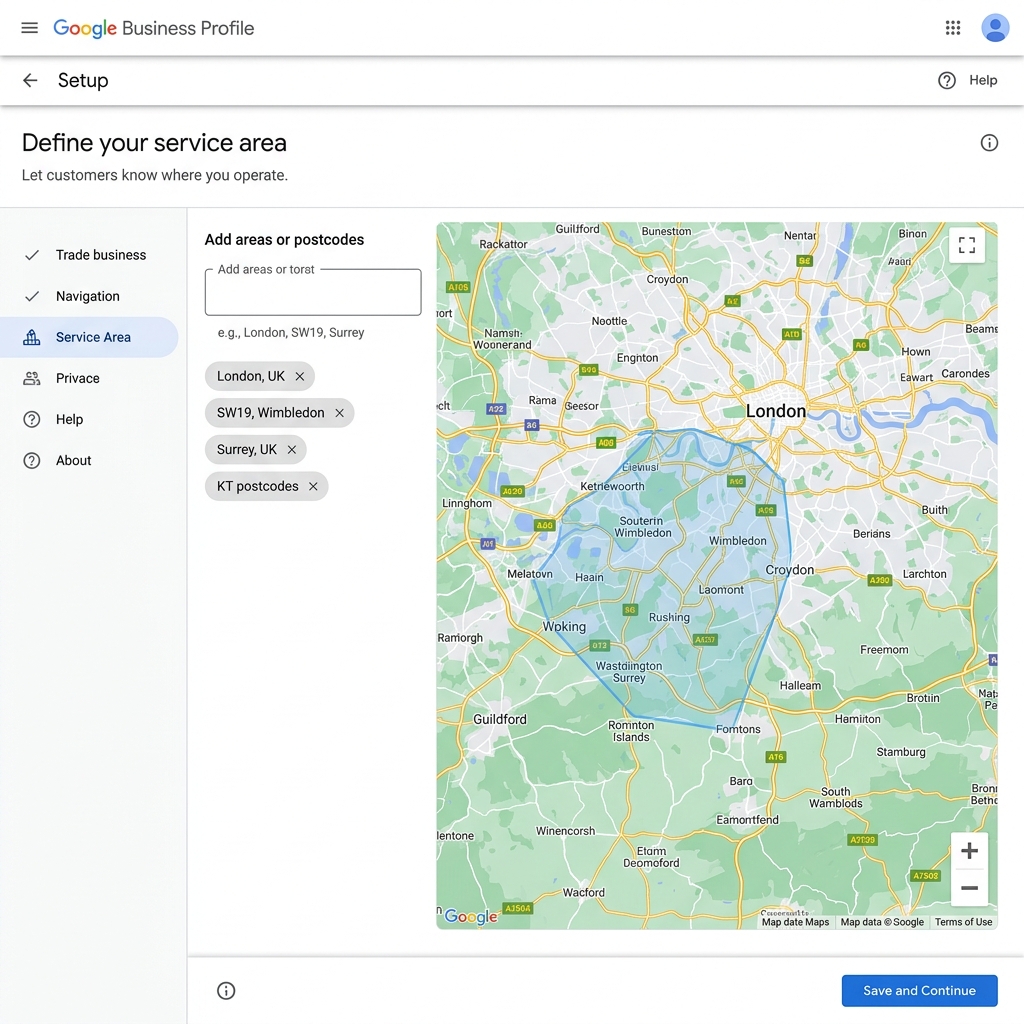
Set Service Areas and Coverage
4

Add Your Phone Number & Website

  1. Enter your mobile or office landline number.
  2. Enter your official Website link (e.g. https://yourdomain.co.uk). This drives Google search traffic straight to your professional website!
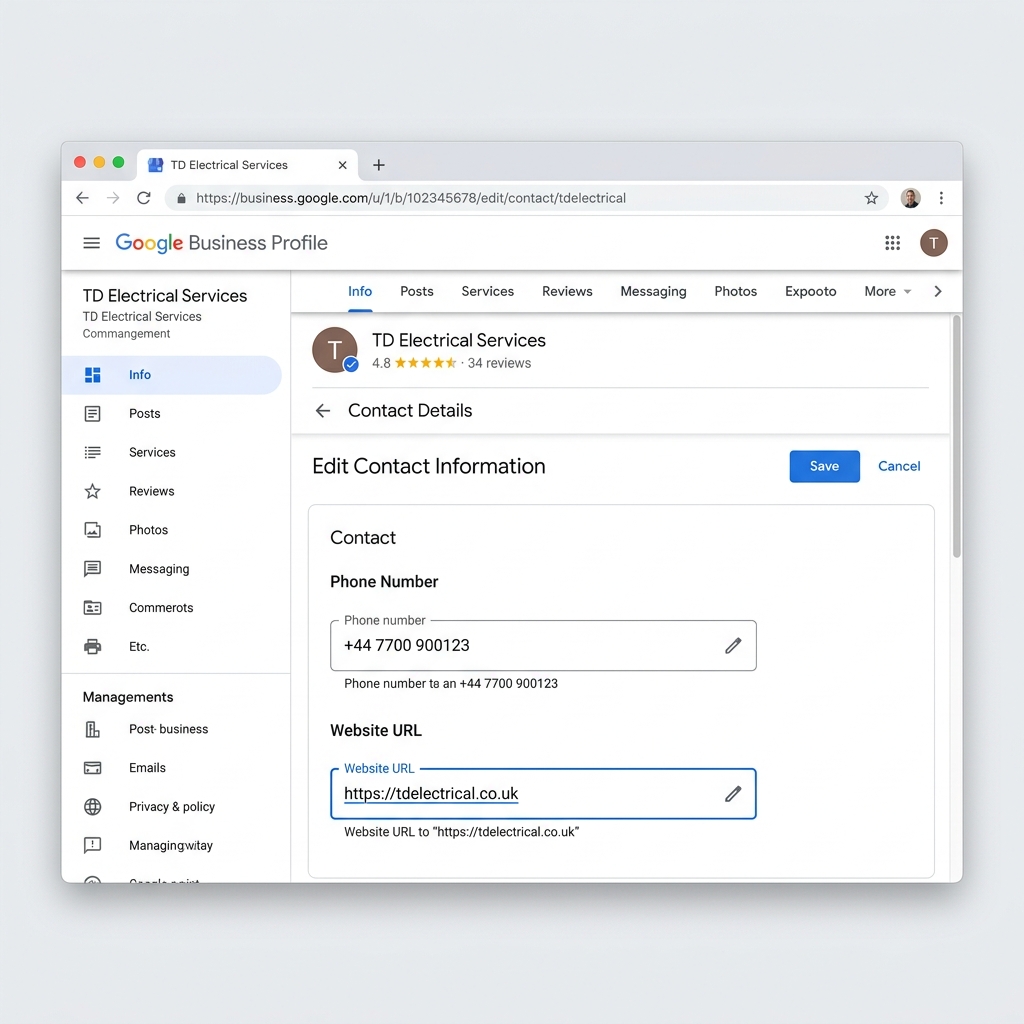
Add Phone Number and Website URL
5

Complete Verification & Add Photos

Verification methods are automatically determined by Google and can’t be changed. (It could be video verification, phone, or postcard). Once verified, upload your business logo, van pictures, and photos of recent work!
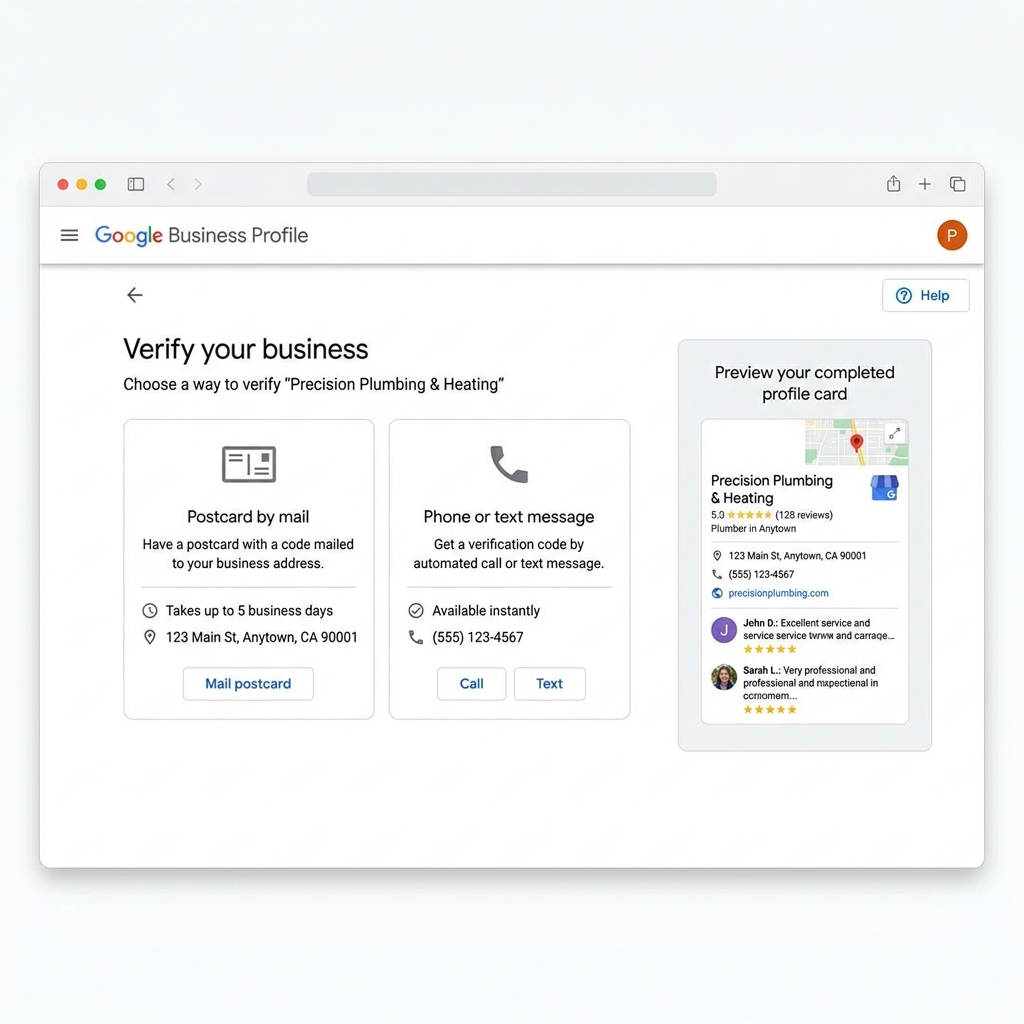
Verify Business and Add Job Photos

Webmeup Pro Tips for Local Trades:

  • Ask Every Client for a Review: After finishing a job, send a quick WhatsApp to your client with your Google Review link.
  • Link to your website: This boosts both your Google Maps ranking and your website SEO.

Need help creating your Google Business Profile?

Webmeup can set up everything for you. WhatsApp us for details of this service.

Contact Webmeup Support
iPhone & iPad Email Guide

How to Set Up Your Webmeup Email on iPhone or iPad

Simplified step-by-step instructions to connect your professional email in minutes using the Apple Mail app.

Server Settings Quick Reference

You will need these exact server details when setting up your device:

Incoming Mail Server
Account Type: IMAP
Host Name: imap.hostinger.com
User Name: Your full email address
Password: Given by WebMeUp Support
Outgoing Mail Server
Account Type: SMTP
Host Name: smtp.hostinger.com
User Name: Your full email address
Password: Given by WebMeUp Support
Your Username & Password: The email address, username, and password will be given to you directly by WebMeUp Support. Both Incoming and Outgoing servers use the same username and password.
1

Open Settings on Your iPhone or iPad

Open the Settings app from your home screen:

  • On iOS 18 or later: Scroll down and tap Apps → tap Mail → tap Mail Accounts.
  • On iOS 17 or earlier: Scroll down and tap Mail → tap Accounts.
  • Tap Add Account.
2

Select "Other" & "Add Mail Account"

  1. In the list of email providers (iCloud, Microsoft Exchange, Google, etc.), tap Other at the bottom.
  2. Under the Mail heading, tap Add Mail Account.
  3. Enter your account information:
    • Name: Your name or business name (e.g. John Smith or ART Systems — this appears as the sender).
    • Email: Your full business email address (e.g. info@yourdomain.co.uk).
    • Password: The password given to you by WebMeUp Support.
    • Description: A friendly name for this mailbox (e.g. Work Email).
  4. Tap Next in the top-right corner.
3

Select IMAP & Enter Server Settings

At the top of the screen, ensure IMAP is selected (it will be highlighted in blue). Then enter the following settings:

Incoming Mail Server

  • Host Name: imap.hostinger.com
  • User Name: Your full email address (e.g. info@yourdomain.co.uk)
  • Password: The password given to you by WebMeUp Support

Outgoing Mail Server

  • Host Name: smtp.hostinger.com
  • User Name: Your full email address (e.g. info@yourdomain.co.uk)
  • Password: The password given to you by WebMeUp Support
Important: Even though your device may label the Outgoing User Name and Password as "Optional", you must enter them. Without them, your device will not be able to send emails.

Once entered, tap Next in the top-right corner. iOS will verify the account settings with the servers.

4

Save & Start Using Mail

  1. Make sure Mail is switched ON (green).
  2. Tap Save in the top-right corner.
  3. Open the Mail app on your iPhone or iPad. Your Webmeup business inbox is ready!

Helpful Notes & Official Documentation:

  • IMAP Synchronization: IMAP keeps all your emails, sent items, and folders synchronized across your iPhone, iPad, laptop, and webmail automatically.
  • Can't Send Emails? If incoming email works but you can't send, re-check your Outgoing Mail Server (SMTP) settings in Settings → Mail → Accounts → [Your Account] → SMTP. Ensure your full email address and password are entered and authenticated.
  • Apple Official Instructions: For Apple's complete documentation and device-specific notes, visit the official guide: Add an email account to your iPhone or iPad (Apple Support) .

Need your email password or help setting it up?

Webmeup Support is here to help. Send us a quick WhatsApp and we'll send your login details or guide you through it.

Contact Webmeup Support
Domain & DNS Configuration Guide

How to Point Your Domain to Webmeup Hosting

Universal DNS instructions for any domain registrar (GoDaddy, 123 Reg, Namecheap, IONOS, etc.). Done in 3 simple steps!

Required DNS Records

Add or update these two records in your domain registrar’s DNS management settings:

A A Record (Root Domain)
Type: A
Name: @
Value: 82.29.185.27
TTL: 3600
CNAME CNAME Record (WWW)
Type: CNAME
Name: www
Value: wimbledonglazier.co.uk
TTL: 3600
Value for CNAME: Enter your domain name, e.g. wimbledonglazier.co.uk (enter your actual domain without https:// or www).
1

Log In to Your Domain Registrar

Log in to the company where your domain name is registered (e.g. GoDaddy, 123 Reg, Namecheap, IONOS, Cloudflare, domaindiscount24, etc.):

  1. Go to your My Domains, Domain Portfolio, or Domain List.
  2. Select the domain you want to connect to Webmeup.
  3. Locate the DNS Settings, Manage DNS, or DNS Records area.
2

Add or Update the "A Record"

The A Record points your main domain name to Webmeup's web server.

In your DNS record list, find the record with Type A and Name @ (or click Add New Record):

Field Value Notes
Type A Standard address record
Name @ Represents root domain (leave blank if @ is not supported)
Value 82.29.185.27 Webmeup server IP address
TTL 3600 3600 seconds (1 hour, or choose 'Default' / 'Automatic')

Tip: If there is already an existing A record pointing to a different IP or parking page, edit it or delete it so only 82.29.185.27 remains.

3

Add or Update the "CNAME Record"

The CNAME Record ensures that visitors entering www.yourdomain.co.uk are directed to your website.

In your DNS record list, find the record with Type CNAME and Name www (or click Add New Record):

Field Value Notes
Type CNAME Alias record
Name www The www subdomain prefix
Value Enter your domain name, e.g. wimbledonglazier.co.uk Your actual domain name
TTL 3600 3600 seconds (1 hour, or 'Automatic')

Important Notes & DNS Propagation:

  • DNS Propagation: Global DNS updates take time to distribute across internet service providers worldwide. Changes usually take effect within 1 to 4 hours, but can take up to 24 hours.
  • Free Automatic SSL: Once your domain points to Webmeup's IP, our servers automatically issue and renew your secure SSL certificate (HTTPS padlock) at no extra charge.
  • External Email Services: If you use an external email provider (such as Google Workspace or Microsoft 365), do not delete your MX or TXT/SPF records — only update the A and CNAME records above.

Need help pointing your domain?

If you'd like our team to check your DNS setup or assist you, send us a WhatsApp message anytime.

Contact Webmeup Support
WhatsApp Icon WebMeUp Support